Thursday, March 29, 2012

Week 31: Recipe #4--Lasagna Roll Ups

I found these on Pinterest, and they are from a blog called Life as a Lofthouse (see link below).  They were really good, and much easier to make than regular lasagna.  Plus, I love the portion control!  The recipe calls for 1/2 lb. ground beef, but I left that out and went meatless.  They were still very tasty.  I served these with a Caesar salad and applesauce.  Makes 9 roll ups.
Photo from Life as a Lofthouse
You'll Need:
  • 1/3 c. grated parmesan cheese
  • 1 (15 oz.) container ricotta cheese
  • 1 c. shredded mozzarella cheese (I was out of this and instead used monterey jack...surprisingly, no one could tell the difference!)
  • 1 egg, beaten
  • 1 1/2 tsp. dried parsley
  • 1/2 tsp. onion powder
  • 1/4 tsp. garlic powder
  • 1 (24 oz.) jar spaghetti sauce
  • 1/2 lb. lean ground beef (I left this out)
  • 9 lasagna noodles
  • 1 c. shredded mozzarella cheese (again I used monterey jack)
Preparation:
  1. Preheat oven to 375 degrees.  Mix together the first seven ingredients (parmesan cheese to garlic powder) in a large bowl.  Cover with plastic wrap and place in fridge while preparing noodles and sauce.
  2. In a large pot of water, boil lasagna noodles according to package directions.  Drain water, and gently lay out noodles onto wax paper.  (Don't let noodles touch because they might stick together.)
  3. Meanwhile, cook hamburger meat in a large skillet until brown.  Drain grease.  Pour in spaghetti sauce and cook until mixture is thoroughly heated, 5-10 minutes.  (Because I left out the meat, I was able to skip this part, cutting down the cooking time significantly.)  Pour 1/3 of the meat sauce in the bottom of a 9 x 13 baking dish.  Set aside.  
  4. Get the cheese mixture from the fridge.  Spread 1/4 cup of cheese mixture onto one lasagna noodle.  (Eyeball this so that you have enough mixture for all 9 noodles.)  Roll up and place seam side down into the baking dish.  Repeat with remaining noodles.
  5. Pour remaining meat sauce over all the roll ups and then sprinkle with 1 cup mozzarella cheese.  Bake for 30 minutes, or until hot and bubbly.  Serve immediately.
Recipe and link:  http://life-as-a-lofthouse.blogspot.com/2011/12/lasagna-roll-ups.html

Wednesday, March 28, 2012

Week 31: Recipe #3--Healthy Mexican Sweet Potato Skins

This recipe was made by mistake.  I had actually intended to make another similar recipe, started it, and left the finishing instructions for my husband.  When I came home, he had made these.  They were on the docket to try later and he thought they were the same thing.  The only thing we didn't have was the chipotle peppers in adobe sauce, so I'd add those next time.  These were pretty tasty though, and filling as well.  They are from a site called Pinch of Yum (see link below).  I served these with a green salad.  Makes 6 servings.
Photo from pinchofyum.com
You'll Need:
  • 3 med. sweet potatoes
  • 1 can corn, rinsed and patted dry
  • 1 can black beans, rinsed and drained
  • 1 Tblsp. butter
  • 1/2 yellow onion, chopped (We used 1/2 a red onion instead)
  • 2-4 canned chipotle peppers in adobe sauce, minced or pureed (Didn't have these, so we left them out)
  • 1 oz. light cream cheese
  • 1/4 c. light sour cream
  • 1 tsp. salt (+ more to taste)
  • 1/2 c. cilantro, roughly chopped
  • 6 Tblsp. shredded cheese (pepperjack, cheddar, colby jack...anything will work--we used cheddar)
Preparation:
  1. Preheat oven to 350 degrees.  Bake the sweet potatoes for 45-60 minutes.
  2. While sweet potatoes are baking, place corn in a heavy cast-iron skillet over med-high heat with no butter or oil.  Sprinkle with salt and other Mexican seasoning (as much as you want).  Do not stir!  Let corn roast for several minutes before stirring.  Let it roast for a few more minutes before stirring again.  Continue this for about 10 minutes, until corn is browned and roasted on the outside.  Set aside in a small bowl with the black beans.
  3. Saute the onion in butter over medium heat until soft and translucent.  Set aside.
  4. Remove sweet potatoes from the oven when fork-tender.  Let cool for 5-10 minutes.  Cut the sweet potatoes in half.  Scrape the flesh of the sweet potatoes out, leaving the skins intact.  Sometimes leaving a thin layer of potato inside of the skins helps them hold together better.
  5. Mix the flesh of the potatoes with the cream cheese, sour cream, chipotle peppers, and salt.  You can use a mixer or just a spoon, depending on how soft the potatoes are.  When well-mixed, gently stir in the black beans, roasted corn, sauteed onions, and cilantro.
  6. Scoop the filling into the skins and top each with 1 tablespoon shredded cheese.  Broil for about 5 minutes or until cheese is melted.
Recipe and link:  http://pinchofyum.com/healthy-mexican-sweet-potato-skins?utm_campaign=Feed%3A+pinch-of-yum+%28Pinch+of+Yum%29&utm_medium=feed&utm_source=feedburner&utm_content=Google+Reader

Monday, March 26, 2012

Week 31: Recipe #2--P.F. Chang's Lettuce Wraps--Remade!

These were SO GOOD!  I am so glad I tried this recipe.  It is one of my favorites posted on this blog by far.  We all loved them, even my picky eater.  Plus, they're pretty good for you!  I had 3 wraps for only 8 WW+ points!  The only thing I left out, and not by choice, were the green onions.  When I took them out of the fridge, they didn't look so good, but I definitely will use some next time.  I found these on Pinterest, and they're from a site called Iowa Girl Eats (see link below).  I served these with a variety of fresh fruits.  The recipe says it makes 2-3 servings, but we still had some leftovers in our family of 4 (granted two of the four are littles, but still).
Photo from Iowa Girl Eats
You'll Need:
  • 1 lb. ground chicken breast
  • 1/2 med. onion, minced
  • salt and pepper, a dash of each
  • 2 large cloves garlic, minced
  • 1 inch nob fresh ginger, peeled and minced (Although we had fresh ginger, I took the easy route and just used chopped ginger from the bottle--still great!)
  • 1 Tblsp. sesame oil
  • 2 1/2 Tblsp. soy sauce
  • 1/2 Tblsp. water
  • 1 Tblsp. natural peanut butter (I used what we had--Jif creamy)
  • 1/2 Tblsp. honey
  • 1 Tblsp. + 1 tsp. rice vinegar (I used rice cooking wine instead)
  • 2 tsp. chili garlic sauce, or more if you like it hotter (This was just the right amount of kick for the girls; any more would've been too spicy for them)
  • dash of fresh pepper
  • 3 green onions, chopped
  • 1/2 8 oz. can sliced water chestnuts, drained and chopped (I read this as two 8 oz. cans, and that's what I used.....tasted great!)
  • 1/4 c. peanuts, chopped
  • 10-12 large outer lettuce leaves, rinsed and patted dry
Preparation:
  1. Heat a large nonstick skillet on high.  Add chicken, onion, salt, and pepper, and cook until chicken is nearly done, stirring often to break up the meat.  Add in minced garlic and ginger, and continue cooking until chicken is no longer pink.
  2. Meanwhile, in a microwave-safe bowl, combine sesame oil, soy sauce, water, peanut butter, honey, rice vinegar, chili garlic sauce, and pepper.  Microwave for 20 seconds, then stir until smooth.  Add into the skillet and stir to combine.
  3. Add green onion and water chestnuts into the skillet then cook for 1-2 minutes until the onions are soft and the water chestnuts are heated through.
  4. Sprinkle with chopped peanuts, and serve with cold lettuce leaves.
Recipe and link:  http://iowagirleats.com/2011/04/26/p-f-changs-lettuce-wraps-remade/

Saturday, March 24, 2012

Week 31: Recipe #1--Spinach, Bacon, & Egg Quiche Cups

My girls LOVE quiches, actually eggs in general, so these were an instant hit.  They both ate their entire "cupcake" and asked for seconds.  I found these on Pinterest.  They are from a site called Sugar-Free Mom (see link below).  My husband and I liked them too, although we topped them off with a little hot sauce for more flavor.  These cupcakes are 3 WW+ points each.  I'll definitely be making these again!  I served these as "Breakfast for Dinner" with hashbrowns and fresh fruit.  Makes 12 cupcakes.
Photo from www.sugarfreemom.com
You'll Need:
  • 10 eggs, beaten
  • 1/4 tsp. salt
  • 1/2 c. milk, 1%
  • 1/2 c. low fat shredded cheese
  • 6 slices turkey bacon, chopped (The bacon is optional, without it they are 2 WW+ points each)
  • 2 c. chopped spinach, fresh or frozen (I used frozen)
Preparation:
  1. Preheat oven to 350 degrees.
  2. If using bacon cook in a saute pan until crisp.
  3. Add spinach to bacon and heat on low to warm through.
  4. Spray a 12 cup capacity muffin pan with nonstick cooking spray.
  5. Whisk egg, salt, and milk together in a bowl.
  6. Evenly distribute bacon and spinach into each muffin cup.
  7. Evenly add cheese to each muffin cup.
  8. Pour egg mixture into each muffin cup about 3/4 of the way.
  9. Bake for 25 minutes.
Recipe and link:  http://www.sugarfreemom.com/recipes/mini-spinach-bacon-egg-quiches/

Week 30: Recipe #5--Crockpot Pasta and Cheese Delight

I found this recipe on about.com (see link below).  It was really easy to throw together, and not a lot of cleanup, which is always a plus in my book.  I'm not sure what to think about the taste.  I didn't NOT like it, but the Alfredo with the cream of mushroom soup AND the tuna?  Weird.  Not bad--just weird.  The girls both loved it, so it's worth making again for them.  I served this with a green salad and fruit.  Makes 4 servings.

You'll Need:

  • 1 jar Alfredo sauce
  • 1 can Healthy Request cream of mushroom soup
  • 1 can (7 oz) white tuna or chicken, drained, or use leftover cooked chicken or meat
  • 1/4 tsp. curry powder
  • 1 to 1 1/2 c. frozen mixed vegetables
  • 1 1/2 c. shredded swiss cheese (I used shredded cheddar--not a fan of swiss)
  • 4 c. cooked pasta (macaroni, bow ties, shells)
Preparation:

  1. Combine first 5 ingredients; cover and cook for 4 to 5 hours on low.  Add cheese to the mixture during the last hour.  
  2. Cook pasta according to package directions; drain and add to slow cooker.  
Recipe and link:  http://southernfood.about.com/od/crockpotchicken/r/bl118c10.htm

Wednesday, March 21, 2012

Week 30: Recipe #4--Cranberry Turkey in a Slow Cooker

With all of the cold weather we've been having lately, this recipe was the perfect one to come home to...smelled so good, and reminded me of Thanksgiving.  The sauce was REALLY tasty; we all loved it.  I found this recipe on a site called Slow and Simple (see link below), and it was exactly that.  The only thing that I'd do differently next time is make sure that my husband buys a turkey breast, not tenderloins.  We cooked them for the same time given for the breast, and they were a bit dry.  Still tasty, though!  One review said to use skinned turkey legs, they absorbed the flavor better.  Might try that as well.  I served these with mashed potatoes and green peas.  Servings vary based on the size of the turkey breast.
Photo from www.slowandsimple.com
You'll Need:
  • 1 turkey breast, thawed in refrigerator
  • 1 envelope Lipton onion soup mix
  • 1 can cranberry sauce
Preparation:
  1. Place turkey in the crockpot.  Mix together cranberry sauce and soup mix and pour over turkey.
  2. Cook on high for 2 hours, then on low for 6 to 7 hours.
Recipe and link:  http://www.slowandsimple.com/Cranberry_Turkey_in_a_Slow_Cooker-r-482.html

Tuesday, March 20, 2012

Week 30: Recipe #3--Chicken Pot Pie Bundles

These were yummy!  We all liked them (minus the peas, for my oldest).  I found these on a site called Meal Makeover Moms (see link below).  They makeover recipes so that they are a bit healthier.  Two of these bundles are 9 WW + points, and they were pretty filling with a green salad and some fruit.  I followed the recipe exactly, and it was pretty quick and easy to make.  Makes 6 servings.
Photo from mealmakeovermoms.com
You'll Need:
  • 1 1/2 Tblsp. canola oil, divided
  • 1 large carrot, peeled and cut into 1/4-in. cubes (about a cup)
  • 1/2 small onion, cut into 1/4-in. cubes (about 1/2 a cup)
  • 2 cloves garlic, minced
  • 1 lb. boneless, skinless chicken breast halves, cut into 1/2-in. cubes
  • 2 tsp. chopped fresh tarragon or 1/2 tsp. dried tarragon (I used dried)
  • 1/2 tsp. kosher salt
  • pinch of black pepper
  • 1 c. all-natural chicken broth
  • 4 tsp. cornstarch
  • 3/4 c. frozen petite peas, thawed
  • 3/4 c. frozen corn kernels, thawed (I didn't thaw the peas or corn ahead of time, and they turned out fine anyway)
  • 2 Tblsp. grated parmesan cheese
  • 12 egg roll wraps (NOT the smaller wonton wrappers)
Preparation:
  1. Preheat the oven to 350 degrees.  Heat 1 tablespoon of the oil in a large nonstick skillet over medium-high heat.  Add the carrot and onion and cook, stirring frequently, until softened, about 5 minutes.  Add the garlic, and cook 1 minute more.
  2. Stir in the chicken, tarragon, salt, and pepper.  Cook until the chicken is no longer pink, about 5 minutes.
  3. Place the broth and cornstarch in a bowl and whisk until well combined.  Add to the skillet along with the peas and corn, and bring the liquid to a simmer, stirring constantly.  Continue to simmer and stir gently until the sauce thickens, about 2 minutes.
  4. To prepare the bundles, use a muffin pan with 12 medium-sized cups (do not coat with nonstick cooking spray).  Gently place 1 egg roll wrap into each cup, letting it extend over the sides.
  5. Place a generous 1/4 cup of the chicken mixture into each wrap, and sprinkle the cheese on top.  Fold the corners up and over the top of the filling and press to seal the edges (it doesn't have to be perfect!).  Brush the remaining oil on top of each bundle.
  6. Bake until golden and crisp, 12 to 15 minutes.  Cool slightly before eating.
Recipe and link:  http://mealmakeovermoms.com/recipes/comfort-food/chicken-pot-pie-bundles/

Saturday, March 17, 2012

Week 30: Recipe #2--Mexican Stuffed Shells

These were a hit!  I loved them and so did my whole family.  The best stuffed shells I've ever made by far. I pretty much followed the recipe.  They were easy to make, although a bit longer to cook in the oven than I'd like for a weeknight.  Luckily, I made them on a Saturday.  I found these on Pinterest, and they're from a site called The Way to His Heart (see link below).  I served these with black beans (which both my girls can eat by the handfuls) and grapes.  Makes 16-20 shells.
Photo from thewaytohisheart.wordpress.com
You'll Need:
  • 1 lb. ground beef
  • 1 pkg. low-sodium taco seasoning
  • 4 oz. cream cheese (I used light cream cheese)
  • 14-16 jumbo pasta shells (I was able to make 20)
  • 1 1/2 c. salsa
  • 1 c. taco sauce (This is a smooth, tomato-based sauce found in the Mexican section of the grocery store)
  • 1 c. cheddar cheese, shredded
  • 1 c. monterey jack cheese, shredded
  • 3 green onions
  • sour cream
Preparation:
  1. Preheat oven to 350 degrees.
  2. In a frying pan brown ground beef; add taco seasoning and mix well.  Add cream cheese, cover and simmer until cheese is melted.  Blend well.  Set aside and cool completely.  (I did not cool the meat or the pasta completely...I wanted it in the oven ASAP.  Turned out fine.)  While ground beef is cooking, cook the pasta shells according to directions; drain.  Set shells out individually on cutting board/baking sheet so that they don't stick together.  (I also just pulled them right from the strainer to stuff them--why waste a clean cutting board?)
  3. Pour salsa on bottom of 9 x 13 baking dish.  Stuff each shell with the meat mixture.  Place shells in 9 x 13 pan open side up.  Cover shells with taco sauce.  Cover with foil and bake for 30 minutes.
  4. After 30 minutes, add shredded cheese and bake for 10-15 minutes more, with foil removed.  Top with any condiments you'd like (green onions, black olives, etc.).  Serve with sour cream and/or more salsa.
Recipe and link:  http://thewaytohisheart.wordpress.com/2011/09/30/mexican-stuffed-shells/

Thursday, March 15, 2012

Week 30: Recipe #1--Bacon Ranch Slowcooker Chicken

This recipe comes from Kelly's Healthified Kitchen (see link below).  It's pretty easy to throw together (in fact, my husband did this while I was at work today), and it tasted really good!  It is very similar to another recipe I've previously tried and posted:  Creamy Ranch Chicken .  I think I might like this one a bit better.  Plus, because it's cooked in the crockpot, the actual time spent making it was way less, and cleanup was easier, too.  We used turkey tenderloins instead of chicken breasts, and I recommend not using the full ranch packet, as it can tend to get too salty.  Other than that, I followed the recipe as it was.  I served this with a side of veggies and some fruit.  Makes 4 servings.
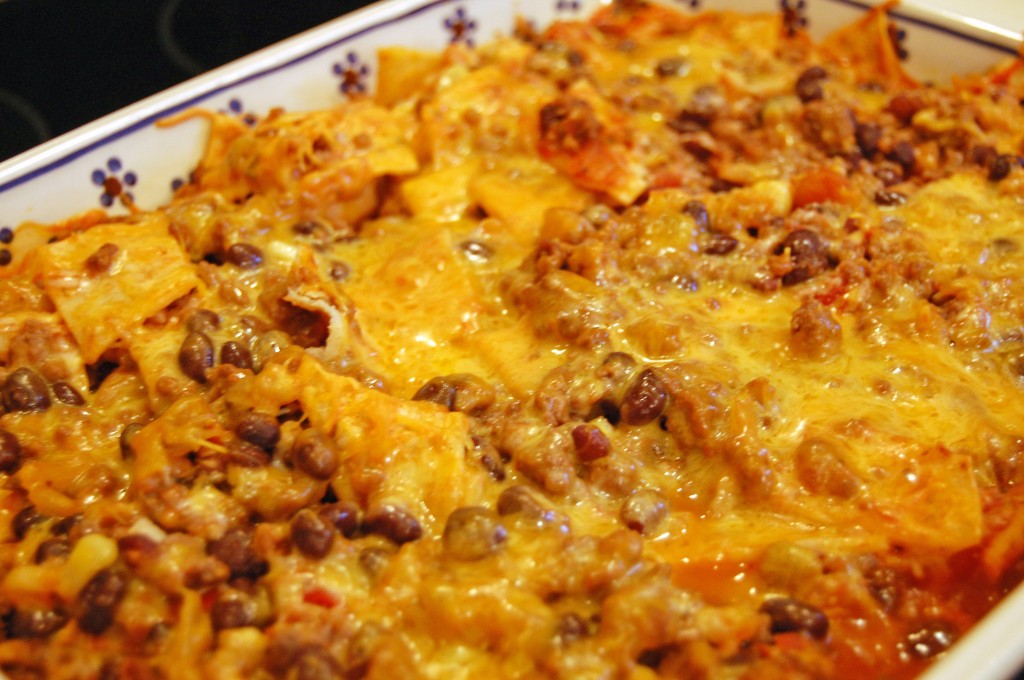
Photo from Kelly's Healthified Kitchen
You'll Need:
  • 2 turkey bacon strips, cooked and shredded
  • 1 tsp. minced garlic
  • 1 pkg. ranch dressing mix (I recommend 1/2 to 3/4 of a packet to avoid oversaltiness)
  • 1 can (10 3/4 oz.) condensed cream of chicken soup (98% fat free)
  • 1 c. fat-free sour cream
  • 16 oz. chicken breasts (or turkey), frozen or defrosted/raw (I put them in frozen)
  • 8 oz. pasta, cooked (I used rigatoni, like the site recommended)
Preparation:
  1. Combine the first five ingredients.  Place frozen or defrosted/raw chicken in crockpot sprayed with nonstick cooking spray and pour sauce over the top (do NOT include water like the can mentions).  
  2. Cook on high for 3.5 hours.  Shred the chicken with two forks and place it back in the crockpot and mix in with the sauce.
  3. Cook pasta per package instructions, then mix in the crockpot with the chicken and sauce.  
Recipe and link:  http://healthifiedkitchen.blogspot.com/2010/08/bacon-ranch-slowcooker-chicken.html

Sunday, March 11, 2012

Week 29: Recipe #5--Chicken with Mustard Cream Sauce

I found this recipe on the Pioneer Woman website (see link below).  I wasn't sure initially how my husband would like it, because we don't usually have mustard-y meals, but he really liked the sauce.  Surprisingly, I did, too.  The girls liked the chicken (I didn't put extra sauce on theirs), and the 15 month old ate almost one whole cutlet by herself.  It was pretty easy to make, too.  I would definitely make this again, especially if we were having company.  It's a very different taste for chicken, which I liked.  I served this with mashed potatoes and fruit.  (I would've served it with some greens, but we needed to go to the grocery store, so we went with what we had.)  Makes 8 servings.
Photo from Pioneer Woman
You'll Need:
  • 4 boneless, skinless chicken breasts
  • 2 Tblsp. olive oil
  • 2 Tblsp. butter
  • 3 whole garlic cloves, minced
  • 1 c. brandy (or white wine, if preferred--I used the white wine for cooking)
  • 1 Tblsp. (heaping) dijon mustard
  • 1 Tblsp. (heaping) grainy mustard
  • 1/4 c. to 1/2 c. heavy cream
  • 1/4 c. to 1/2 c. chicken broth
  • salt and pepper, to taste
Preparation:
  1. Cut the chicken breasts in half lengthwise so that you have eight smaller, thinner chicken cutlets.  Salt and pepper both sides.
  2. Heat oil and butter in a large skillet over medium-high heat.  Cook cutlets on both sides until nice and golden brown and cooked through.  Remove chicken from the skillet and keep on a plate.
  3. Reduce the heat to medium.  Add the garlic to the pan and saute it for a minute, stirring to make sure it won't burn.  Next pour in the brandy (or wine if using) being careful if cooking over and open flame.  Then just let the booze bubble up and cook until it's reduced by half.
  4. Throw in the mustards and stir to combine, then pour in the cream.  Stir in chicken broth, adding more if the sauce seems to thick.  Taste sauce and adjust whatever you think it needs.  Add chicken breasts back to the pan, nestling them into the sauce.  Allow sauce to cook for another few minutes, shaking the pan if needed to move things around.
  5. Serve chicken with a green salad, spooning the sauce over the top.
Recipe and link:  http://thepioneerwoman.com/cooking/2012/02/chicken-with-mustard-cream-sauce/

Saturday, March 10, 2012

Week 29: Bonus Potluck Recipe--Jimmy Fallon's Crockpot Chili

This week we had a potluck at work, and I was in charge of bringing a crockpot soup.  I stumbled upon this recipe on Martha Stewart's website (see link below), and it turned out great!  Who knew Jimmy Fallon knew how to make a good chili??  I changed it up a bit by leaving out the cilantro and the habanero pepper.  I think I'd try adding them next time, but since this chili was for everyone at the office, I chose to leave them out this time.  I served this with shredded cheddar cheese, sour cream, and tortilla chips.  Makes 8 servings.
Photo from www.marthastewart.com
You'll Need:
  • 2 Tblsp. olive oil
  • 3 1/2 lbs. ground chuck beef, ground for chili
  • coarse salt and freshly ground pepper
  • 1 large white onion, chopped
  • 3 cloves garlic, finely chopped
  • 1/2 habanero chile, seeded and finely chopped
  • 1/4 c. chile powder
  • 1 Tblsp. dried oregano
  • 1 1/2 tsp. ground cumin
  • 1/4 tsp. cayenne pepper
  • 2 cans (28 oz. each) whole tomatoes, coarsely chopped with their juices (I bought diced so that I wouldn't have to chop them)
  • 1/3 c. chopped fresh cilantro, plus more for serving
  • 1 bottle (12 oz.) amber beer
  • 2 cans (15 oz.) kidney beans, drained and rinsed
  • For serving:  tortilla chips, shredded cheddar cheese, chopped tomatoes, sour cream, and lime wedges
Preparation:
  1. In a large skillet, heat 1 tablespoon olive oil over medium-high heat.  Working in batches if necessary, add beef and cook until no longer pink, about 3 minutes.  Season with salt and pepper; drain in a colander, discarding fat, and set aside.
  2. Add remaining tablespoon olive oil to skillet and reduce heat to medium.  Add onions, garlic, and habanero; season with salt.  Cook until translucent, about 5 minutes.
  3. In a 6-quart crockpot, combine beef, onion mixture, chile powder, oregano, cumin, and cayenne pepper; stir to combine.  Add tomatoes, cilantro, and beer; cover and cook on high, stirring occasionally, for 5 hours.  (Because I was bringing this to work for lunch, I cooked this on low the night before, then kept it on warm until 1/2 hour before it was ready to serve.)
  4. Add kidney beans and season with salt and pepper.  Continue to cook, uncovered, until thickened, about 30 minutes.  Garnish with cilantro and serve with desired toppings.
Recipe and link:  http://www.marthastewart.com/317342/jimmy-fallons-crock-pot-chili

Week 29: Recipe #4--Slow Cooker Sweet and Tangy Meatballs

This is a SUPER easy recipe--it doesn't get much easier than this.  These meatballs would be good to have as an appetizer, but they also worked for us over some rice with a side of veggies.  I found these on the website Six Sisters Stuff (see link below).  They smelled wonderful cooking in the crockpot, and they tasted great.  Makes 4-6 servings.
Photo from Six Sisters Stuff
You'll Need:
  • 1 jar (12 oz.) chili sauce
  • 1 jar grape jelly
  • 1 pkg. frozen meatballs (I used Trader Joe's turkey meatballs, and I used 1 1/2 bags, which turned out to be 20 meatballs)
Preparation:
  1. Combine jelly and chili sauce in a crockpot and stir until smooth.  Heat the mixture if need to combine.  
  2. Add meatballs and set temperature to low.  Cook for 2-5 hours on low.  
  3. Serve over rice or with toothpicks!
Recipe and link:  http://www.sixsistersstuff.com/2011/06/slow-cooker-sweet-and-tangy-meatballs.html

Thursday, March 8, 2012

Week 29: Recipe #3--Beef and Black Bean Taco Bake

I found this recipe on Pinterest.  It is from a site called Eat at Home Cooks (see link below).  It is SUPER easy to make, it only has 5 ingredients, and it was delicious!  I will definitely making this again soon.  My girls both LOVE black beans, so this was a hit with them.  I served this with a green salad and some fruit.  Makes 6-8 servings.
Photo from eatathomecooks.com
You'll Need:
  • 1 lb. ground beef, browned
  • 1 jar black bean and corn salsa
  • 1 can black beans
  • 6-10 tortillas, flour or corn (I used 8 corn)
  • 2 c. cheddar cheese, shredded 
  • optional:  extra cheddar cheese for topping
Preparation:
  1. Mix all ingredients together in a large bowl.
  2. Pour into a 9 x 13 casserole dish that has been sprayed with cooking spray.
  3. Cover and bake at 350 degrees for 30-45 minutes.  (I forgot to cover it, and it turned out fine.)
Recipe and link:  http://eatathomecooks.com/2010/04/beef-and-black-bean-taco-bake.html

Monday, March 5, 2012

Week 29: Recipe #2--Pesto-Stuffed Shells

This recipe is from Budget Bytes (see link below).  I love pesto, and these jumbo shells, much like the "cupcake" idea, are great for portion control.  These were easy to make (although with cooking time took a bit longer than I normally like a meal to take), and they were delicious.  I left off the chopped spinach, but other than that I pretty much stuck to the recipe.  I served these with green beans and applesauce.  Makes 7 servings.
Photo from Budget Bytes
You'll Need:
  • 1 box (12 oz.) jumbo shell pasta
  • 15 oz. part skim ricotta
  • 1 c. shredded mozzarella
  • 1/2 c. pesto
  • 1 large egg
  • 2 c. fresh spinach (optional)
  • 1 Tblsp. cooking oil
  • 3 c. (1 jar) pasta sauce
Preparation:
  1. In a bowl, mix together the ricotta, mozzarella, pesto, and egg.  Roughly chop the spinach (if using) and stir it into the cheese mixture.  Refrigerate filling until you are ready to use it.
  2. Cook the pasta according to the directions on the box (boil for about 12 min.).  Add oil to the boiling water to prevent shells from sticking.  Be careful not to overcook the pasta or else it will rip easily and be too mushy after cooking with the filling and sauce.  Drain the pasta and rinse with cool water to stop the cooking process.  
  3. Preheat oven to 350 degrees.  Spoon about 2-3 tablespoons of cheese mixture into the center of each shell.  There should be enough mixture to fill the shell so that it stays open just slightly (the edges should be about 1/2 inch apart).  Fill as many shells as you can with the cheese mixture.
  4. Spread one cup of pasta sauce into the bottom of a rectangular glass baking dish (smaller than 9 x 13).  You want to pack them tightly in a single layer.  If you space them too far apart, they will dry out during the cooking process.  Place all of the shells in the baking dish as close together as possible and pour the remaining 2 cups of sauce over the top.  Bake for about 30 minutes or until the sauce is bubbling up around the edges.
Recipe and link:  http://budgetbytes.blogspot.com/2010/03/pesto-stuffed-shells-851-recipe-142.html

Sunday, March 4, 2012

Week 29: Recipe #1--Pepperoni Pizza Cups

I found this recipe on a site called For the Love of Cooking (see link below).  These would be good as a snack, but also could be a meal, as we had them tonight.  I love the idea of dinner in the form of a "cupcake" because it's great for portion control.  You can have three of these "cupcakes" for only 8 WW Points Plus points.  Not too bad!  They were pretty tasty, too!  Everyone loved them.  I served these with a green salad and some fruit.  Makes 10 cupcakes.
Photo from For the Love of Cooking
You'll Need:
  • cooking spray
  • 1 tube refrigerator biscuits (I used Pillsbury...if I wasn't married, I don't know how I'd ever open one of those.  Is anyone else TERRIFIED of the pop?!?)
  • pizza sauce
  • mozzarella cheese, diced or shredded
  • turkey pepperoni slices
  • parmesan cheese, shredded
  • dried basil (I used Italian seasoning)
Preparation:
  1. Preheat the oven to 375 degrees.  Coat a muffin tin with cooking spray.
  2. Press the dough of a biscuit into the bottom and sides of the muffin tin.  Repeat with the remaining dough.  (The original recipe says you can cut each biscuit in half for "thin crust"...I couldn't get that to work right.  One full biscuit per muffin tin wasn't too doughy.  It was just right.)
  3. Spoon sauce into each cup.  Place some mozzarella cheese into the cups, followed by a few slices of pepperoni.
  4. Finally, add a bit more mozzarella, if desired, then sprinkle the tops with parmesan cheese and dried basil (or oregano, or Italian seasoning...whatever you're using).  
  5. Place into the oven and bake for 15 minutes or until the crust is golden brown and the cheese has melted.  Serve immediately.
Recipe and link:  http://www.fortheloveofcooking.net/2011/05/pepperoni-pizza-cups.html

Saturday, March 3, 2012

Week 28: Recipe #5--Tuscan Pasta with Tomato-Basil Cream

I found this recipe on Pinterest.  It comes from www.myrecipes.com (see link below).  It was pretty simple to make.  The girls love any kind of pasta, so it was a hit with them.  I thought maybe Lily might be tricked into eating a tomato or two, but she ate around them.  The only problem I had making this was that I couldn't find sun-dried tomato Alfredo sauce, so I bought regular Alfredo sauce and mixed it with sun-dried tomatoes.  It turned out okay, but I'd still like to try it the original way.  I also used dried basil vs. fresh because it's what I had on-hand.  I served this with a green salad and green beans.  Makes 4 to 6 servings.
Photo from www.myrecipes.com
You'll Need:
  • 1 pkg. (20 oz.) refrigerated four cheese ravioli (I used three-cheese tortellini instead)
  • 1 jar (16 oz.) sun-dried tomato Alfredo sauce
  • 2 Tblsp. white wine
  • 2 medium-sized fresh tomatoes, chopped
  • 1/2 c. fresh basil, chopped
  • 1/3 c. grated parmesan cheese (I skipped this, and it tasted fine without)
  • optional garnish:  fresh basil strips
Preparation:
  1. Prepare pasta according to package directions.
  2. Meanwhile, pour Alfredo sauce into a medium saucepan.  Pour wine into sauce jar; cover tightly and shake well.  Stir wine mixture into saucepan.  Stir in chopped tomatoes and 1/2 cup chopped basil, and cook over medium-low heat 5 minutes or until thoroughly heated.  Toss with pasta, and top evenly with 1/3 cup grated parmesan cheese.  Garnish, if desired.
Recipe and link:  http://www.myrecipes.com/recipe/tuscan-pasta-with-tomato-basil-cream-10000001646355/